Contents
If you’re self-employed, then invoicing is a crucial part of your job. Without it, you’ll never know how much money is coming in or going out of your business. But if invoicing doesn’t come naturally to you, don’t worry: we’ve put together this guide on how to correctly invoice clients for services rendered.
Self-Employed Invoice Template
An invoice is a document that you send to your client to request payment for goods or services provided. It includes details such as the amount owed, when it was due, and what exactly was provided. The client will then pay the invoice by cheque or credit card payment.
You can create an invoice by using professional software like QuickBooks Self-Employed, which allows you to track your finances easily and accurately. If you don’t want to use this program or don’t have access to it, there are other options available online:
- Create an invoice template in Excel or Sheets (see below)
- Use an online tool like Invoice Machine
- Use invoicing software that lets you create professional-looking invoices from scratch
Step-By-Step Guide To Invoicing Clients
The first step to creating invoices for your clients is to create an invoice template. The best way to do this is by using a spreadsheet, which will allow you to keep track of invoices, payments received and outstanding invoices.
Let’s look at the steps involved in creating the most basic invoice template using sheets:
- Create a spreadsheet that has four columns: Company Name, Total Amount Due (this will be filled out by hand), Date Paid (this can be filled out manually), and Other Details.
- In cell A1 enter “Company Name” (the name of the company or person who owes you money). In cell D4 type “Total Amount Due”. This will represent how much money needs to be paid before taxes are calculated and any discounts applied. It does not need to include tax information yet if you do not want it too! In cell F4 type “Date Paid”, which represents when this particular invoice was paid by its recipient.”Other Details” may have additional fields such as tracking numbers or more descriptive information regarding payment options; feel free to fill these cells in as necessary!
What Is An Invoice?
An invoice is a detailed record of your work. It is sent to your clients as part of the payment process, and serves as a legal document outlining the details of your services. This way, both parties have all their bases covered in case there are any questions or disagreements later on.
An invoice can help build your reputation among clients who trust you to deliver high-quality work in a timely manner. It also gives you an opportunity to communicate with them in more detail than just emails or phone calls would allow—you can use this opportunity to explain what steps you took during their project and why those choices were made (for example, maybe there was an unexpected hiccup that affected how long it took).
Business Name & Address
- Business name and address
- Business phone number
- Business email address
- Business website (optional)
- Business logo (optional)
Invoice Number
A unique invoice number is the cornerstone of your invoicing process. It’s how you will assign every one of your bills, and it needs to be simple enough that you can remember it, but also memorable enough that other people will as well.
The best way to set up an invoice number is with a sequential system: starting at 1 and moving upward by one for each new bill (1,2,3…). Or start at 1000 and move downward by 100 for each new bill (2000,1900…). Or use any other type of system where numbers are easy to read and remember but not too long or short so as not to clog up your database or hard drive space when storing them electronically. You could even incorporate letters into the mix if that helps make things more personal or memorable (iA1B2C3…), but only if they aren’t confused with typical alpha characters such as “a” or “b” which could cause confusion later down the line when referencing older invoices in spreadsheets or databases used for accounting purposes.
Due Date
- The due date should be set with the client.
- It should clearly state that payment is due on or before a certain date.
- It should not be vague or uncertain. If you are working for an agency, such as a law firm, this is commonly included in their standard contract language, so it will already have been decided upon. Otherwise, you can set your own policy with clients who prefer more flexibility than other businesses might offer them—but remember that this could lead to more back-and-forth discussion over deadlines and payment terms (which may take valuable time away from your business).
- It should be reasonable: If you’re just starting out and have limited resources, try setting late fees when payments are several days late (or even weeks). But if your company is profitable enough to afford those costs without being negatively impacted by them financially then go ahead and charge them right away! Your goal here is to find balance between having enough time between invoicing clients while still receiving payments promptly enough so they don’t ask questions later when they see their account balances decreasing too quickly beyond normal amounts owed at any given point during a year’s cycle.”
Description Of Services Rendered
The services you described in this section are what the client expected you to do, so they should be familiar with and clear. Include specific information about how long each task took, special tools or equipment that were used and any other relevant details.
If you’re in a field where there is some ambiguity around how to perform certain tasks, mention this in your description along with some tips on how to get it right. For example: “This was my first time installing [name of equipment], so I had to consult with an expert for advice on the best way to implement it into my project plan.”
Rate Of Services (Or Total Invoice Amount)
The rate of services is the amount you charge per hour, day, week, month or year. For example your hourly rate is $100; your daily rate is $750; and so on.
The total invoice amount refers to the total cost for the services rendered. It could be an hourly rate multiplied by the number of hours worked (see below). Or it could be a flat fee for one service—for example: “Total bill due today: $500.”
Payment Terms (If Any)
Payment terms are the terms on which a seller will wait to be paid. Commonly, payment terms can either be a fixed amount of time or a percentage of your invoice amount. If you’re unsure whether you’ll have the money to pay at all, consider offering smaller payments throughout the year in installments rather than one lump sum at once.
Payment terms are usually stated on your invoice and must be included in order for it to be legal. They may also be negotiable depending on how much you want from your client; for example, if they want more services from you but can’t afford it now, then perhaps it would benefit both parties if they could pay half up front and half later (or vice versa).
Penalty Fee(S) For Late Payment (If Any)
- The invoices you send out should include all of your contact information, including your name, address, phone number and email.
- Be sure to include the date on which you sent the invoice.
- You can also add a due date or payment terms; this is important if it’s going to take some time for customers to make payments.
Invoicing Is An Important Step For Self-Employed People To Getting Paid.
It’s important to know what an invoice is and why it’s important for both your business and your clients. An invoice is a legal document that summarizes all services you provide, including the time spent on each task and the cost of materials used. This is not only helpful when it comes time to get paid but also helps you track expenses throughout each project.
The invoice should include:
- A description of services provided (i.e., “Web design service”)
- A summary of all hours worked or materials used (i.e., “24 hours at $30/hour”)
- Your name and contact information
If you’re self-employed, it’s likely that your business relies on clients paying invoices. But with so many other responsibilities and tasks to take care of every day, creating invoices can be a time-consuming process. Thankfully, there’s an app that can make the job simpler: Invoice2go lets you generate professional invoices on the go and track payments in real time.
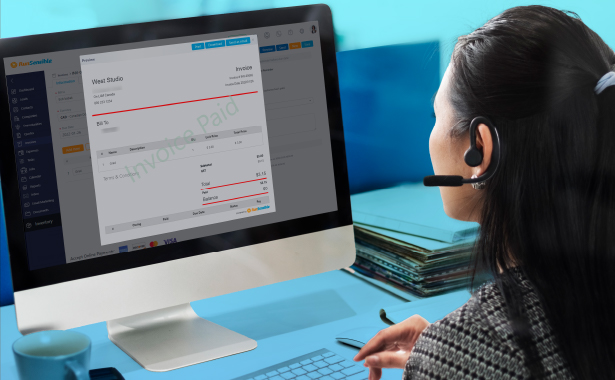
How RunSensible Makes Self-Employed Invoices Faster and Easier
Generating a professional invoice only takes a few simple steps
To generate a professional invoice, you’ll need to be in the app and on the “Create Invoices” screen.
Once you’ve tapped “Create Invoice,” you will see a list of invoices that have already been generated. If this is your first time using the app, it will automatically create an invoice for you. This can also be useful if you want to review or edit an existing invoice before sending it out to a client.
Once an invoice has been generated and approved by yourself or your client (if applicable), it will appear under “My Invoices.” From here, select which billable amount(s) to include on the document.
The next step is choosing whether or not to send your client an electronic copy of their payment summary along with their statement (if applicable). If so, tap “Send Summary” at the bottom right corner of your screen and choose between sending them either as a PDF attachment via email or as a link within QuickBooks Online so they can view their statements online without having access through QuickBooks Online directly themselves!
You can access the app at any time, even when you’re not at your desk.
This app is perfect for those of us who are self-employed, running a freelance business, or working from home on our own schedules. If you’re an entrepreneur with a home office, then this app will help you streamline your billing process. You don’t have to be chained to your desk to keep track of invoices or manage your finances—you can access the app from anywhere (and whenever).
Let’s say that you’re staying at the beach for a week and want to send off some invoices before you go back home. Or maybe it’s raining outside, so it’d be nice to sit inside and work on sending out invoices instead of using wet umbrellas as makeshift umbrellas in the rain outside. With this app, no matter where your current location happens to be (it could even be halfway around the world), all these tasks are possible!
No more paper invoices.
- No more printing, scanning, and filing. Do you know all of those paper invoices that you have to keep track of? Gone.
- No more lost invoices. You know how it is when your computer crashes or there’s a power outage at home—the only copy of an invoice is gone forever? Never again!
- No more forgetting to send an invoice for a job because it’s not in front of you when the client asks for their payment? We’ve all been there, but now it can be avoided with this app!
- And finally, no more worrying about whether or not you sent the right invoice at the right time to save yourself from any unnecessary stress during tax season!
When you’ve finished these steps, you’ll be able to generate and send your client a professional invoice in just a few minutes. You’ll also have an easy-to-use tool for creating future invoices whenever they’re needed so that you’ll never miss another important deadline again!
You can always see if a client has viewed or paid your invoice.
You can always see if a client has viewed or paid your invoice. To do this, click on the invoice in the “My Invoices” section in the app. You’ll then see a table that shows you the client’s name, their email address, invoice number, and date of payment. This table also has two buttons at the bottom: one for viewing an invoice and another for paying it.
To view an invoice that has been paid but not yet viewed by its recipient (or vice versa), simply click on either button in this table to bring up that specific page on which all relevant information will be displayed.
The app to invoice for the self-employed will give you peace of mind and a better way to keep track of your finances. To get started with invoicing, download the app and sign in today!.
It makes invoicing easy and lets you get back to what you do best.
Invoice for the Self-Employed is simple, intuitive and easy to use. You can generate an invoice in minutes and send it over to your client for approval. Once approved, it’s automatically submitted for payment via your preferred method: PayPal, Stripe or Authorize.net. If you don’t have a preferred payment processor and would just like to receive payments from clients using invoices, then Invoice for the Self-Employed can also act as your own personal payment processor through their free service – all you have to do is enter some basic information about yourself (including tax information) in order to get started!
In addition to creating invoices from scratch, it also allows you to export existing ones into the app so that they’re ready for use on any device.
We hope this app has helped you to understand why it’s so essential to invoice for your business. It makes invoicing easy and lets you get back to what you do best, which is running your company.
Conclusion
Invoicing is a simple process and can be done on your own. You can use an invoice template to create the document and get started. Make sure your invoice includes all the necessary information such as business name, address, contact details, invoice number, and payment terms before sending it off to clients for payment.
Disclaimer: The content provided on this blog is for informational purposes only and does not constitute legal, financial, or professional advice.


